Here, you will find out how to import classes from your school's Learning Management System (LMS). You can use Schoology, Clever, Canvas, Classlink or Google Classroom.
For Google Classroom, see this Guide.
Follow these steps for all other LMS:
- Log in to your LMS
- Find the DataClassroom app, and click on the icon. If DataClassroom is not yet added as an app within the LMS by your school, please notify your school or district.
- Approve giving DataClassroom access to the LMS data
DataClassroom should now open in a new window, and you will be logged in under your LMS user identity.
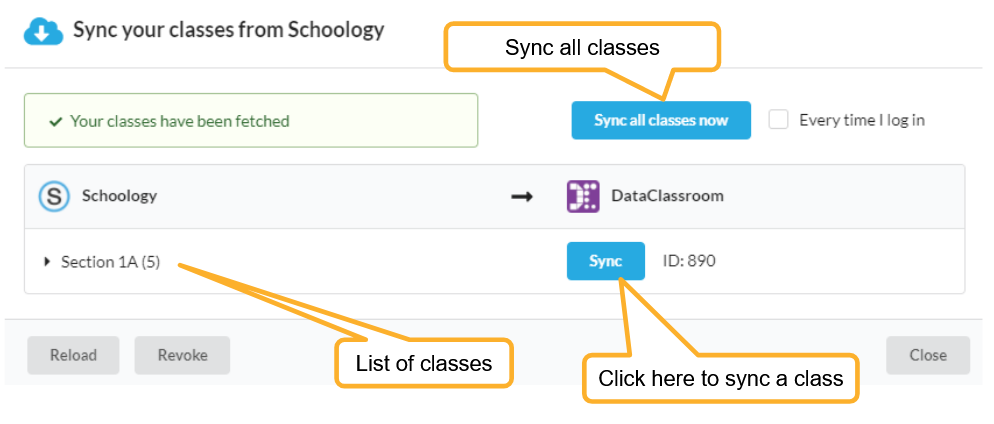
You can now sync your classes either by the Sync your classes button on the screen at login, or by going to Classes under the My Stuff menu and clicking on the Sync button.
Logging in from the LMS
Here is an example of the single-sign-on (SSO) sequence seen when using Schoology. It will differ slightly when using another LMS, but the DataClassroom interface is basically the same for all LMS systems.
Logging in. First step is to click on the DataClassroom icon within the Course or Section view.

A new window will then open, which asks you to confirm that you want to allow DataClassroom to access your information from the LMS. Approve this.

Importing your classes
This process is the same for all LMS (except Google Classroom, see this Guide).
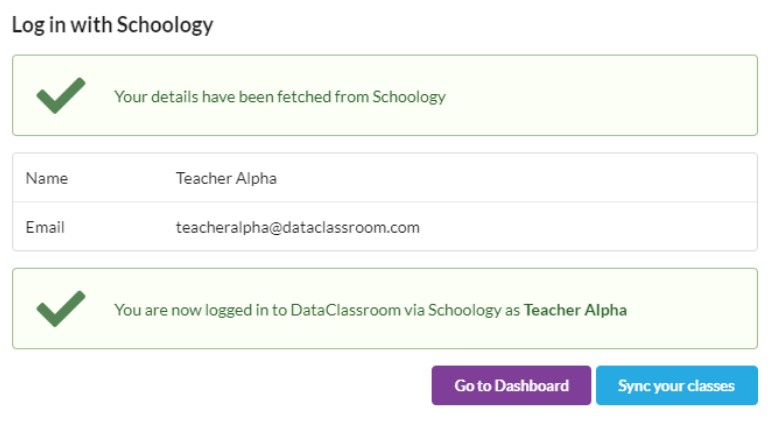
When you arrived from the LMS you will see the DataClassroom interface and it will fetch your details from the LMS. The first time you do this, it will ask you to confirm your registration of a new account. Afterwards, the login should complete automatically and show this:

You can now sync your classes by clicking on the Sync your classes button. See below for other options. The Sync dialog looks like this:

Once your classes have been synced, you will see them listed in the My Stuff -> Classes screen:

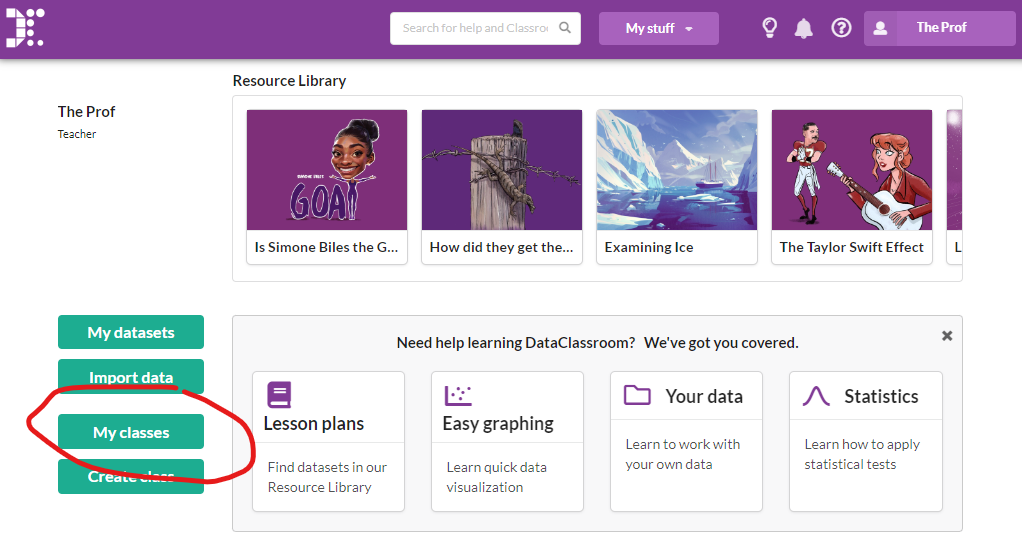
You can always get to the Classes screen through the My Stuff menu at the top of the screen, or from the Dashboard here:
